
How To Install Java
Introduction
We're going to learn how to easily download Java for free, and then install Java.
Have you ever given up on trying to program because you couldn't figure out how to set it up?
How do you know what version of Java to download off of Oracle's Java website?
What is an SDK, what is J2EE, what is an API?
You can learn all of these terms, but if you want to start with Java right away and get it running, then all of the jargon gets in the way. I’m going to say this upfront: This is for absolute beginners. If you don’t know how to program at all, that’s perfect! Those who do know how and want to learn Java quickly can also benefit greatly from this tutorial. I’m going to show you how to program with Java as effectively as possible and as quickly as possible. We’re going to bypass all of the road blocks by learning to install Java and get it working, today.
Installation/Setup
Java can be written with any text editor, as Java is a compiled language. This is a detail we’re going to skip, because understanding this will not help us to get Java working, nor even tell us how to program in it. We want to install Java first, and that's exactly what we're going to do.
What I recommend is downloading Eclipse. Eclipse is much more than a simple text editor, and the version I recommend that you get comes with Java's Development Kit already so there’s little setup. Just follow these easy steps:
Note: If you get stuck at any time, use the form below to contact me and I'll be glad to assist you as soon as possible! I'm here to help you and I firmly believe that anyone can do this!
1. Go download the latest Java runtime environment
This will install Java on your machine. Get the version you need. Most of you probably have Windows, so you'll want to choose one of the Windows downloads. If you happen to have Solaris or Linux, you'd have to get one of those. For those of you on a Mac, guess what? You already have Java! So you can skip this step.
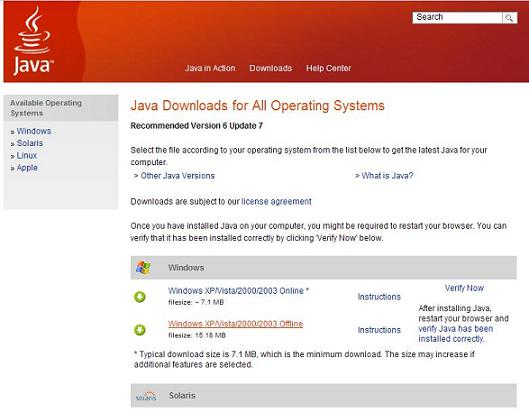
I chose the offline installation, because I think that is easier. Make sure to select run when the download box pops up. Then follow the instructions for downloading the JRE (Java Runtime Environment).
2. Download Eclipse Classic 3.4 (or whatever version exists as of today)
Follow the link to go to the Eclipse downloads page. Make sure you select Eclipse classic.
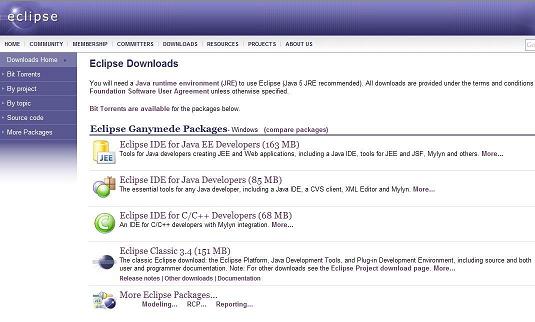
The classic is the 4th choice in the screenshot, although this may have changed. When you get to the next page, you will be asked to choose a mirror. This is so you can choose a download location that is closest to where you live. Just pick one, and this time hit save (not run!) to place the file somewhere on your computer.
3. Unzip the zip file to wherever you’d like.
You can actually just right click the file and select Extract Here. That will put the Eclipse folder into the current folder you're in. If you don't see an option to Extract Here, it's possible you don't have unzipping software. Download WinRAR off of the Internet (it's free) or go get your favorite unzipping software and install it.
4. That’s it! You didn't even have to run an installer if you already had unzipping software!
That was easy, wasn’t it? Now we’re going to open Eclipse, so go into the folder you unzipped, and start-up Eclipse (It looks like a purple circle). If you get a message about your Java Runtime Environment, you need to complete step 1 again. Once that’s done, you’ll notice that a box pops up asking you to set the location of your workspace.
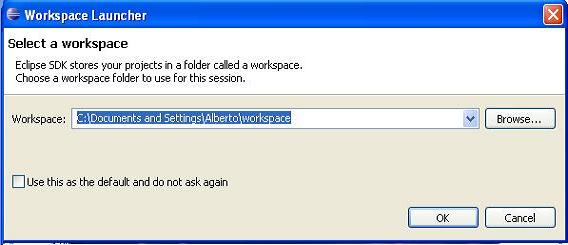
Now, this may seem confusing, but it’s actually simple. A workspace is a folder that contains your Java projects. Hit browse, create a folder to use as the place to put your Java projects, and hit okay. Eclipse will continue to load, and when it’s done, you should see a bluish screen with some circles everywhere.
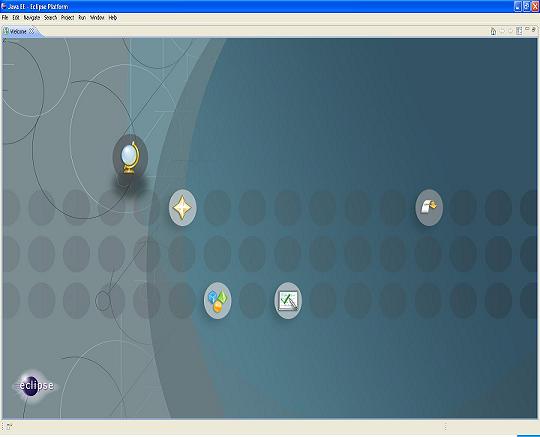
Locate the circle that has an arrow in it. It should say go to workbench when you highlight the circle. Click it, and you’ll be taken to a screen that looks like this:
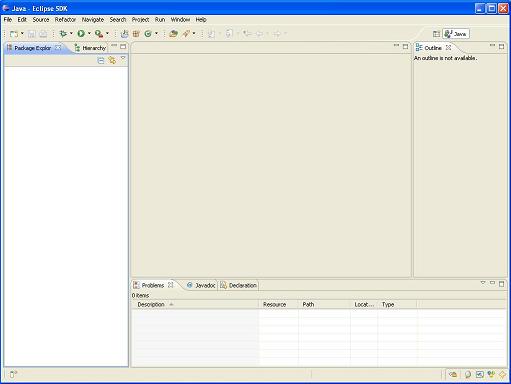
There are lots of features that Eclipse comes with to help aid with developing Java programs, but we’re not going to go into all of that today.
That's how to install Java! You now have all the tools you need to start creating Java programs. In the next tutorial I'll walk you through creating your first Java program using Eclipse.
If you have any questions, comments, or concerns about this tutorial, feel free to contact us.
Found the information on this page useful? Looking for more free Java tips, sample programs, tutorials, and other free goodies delivered right to your email? Click here to sign up for our Java newsletter today!


